Adding Security to Oracle Service Bus with Oracle Web Services Manager
Oracle Web Services Manager(OWSM) allows the definition and storage of declarative policies to be applied to web services, enabling enforcement and monitoring of security, management and audit policies. Web Services security has multiple facets (Authentication, Authorization, Confidentiality, Integrity), each with its own standards, which can be defined as service policies, or just plain policies.
In this post we will use a simple WS-Security Username/Token policy to enforce only the users known by our system will be able to execute the service endpoint. In order to do that, we will use the default user from the Weblogic domain.
1. Create the OSB domain with OWSM.
Please find the below screen shot for reference:
 |
| OSB Configuration for OWSM |
You will need DEV_MDS and DEV_SOAINFRA schema created on Oracle 11g database. You can run RCU to create the same.
Have created sample proxy in OSB to get the customer details based on Customer ID.
Request you to download and import the sbconfig.jar in OSB.
The proxy name CustomerService take Customer ID in request and return its details.
Request:
<cus:Request xmlns:cus="http://www.example.org/Customer">
<cus:customerID>1</cus:customerID>
</cus:Request>
Response:
<tns:Response xsi:schemaLocation="http://www.example.org/Customer Customer.xsd " xmlns:tns="http://www.example.org/Customer" xmlns:xsi="http://www.w3.org/2001/XMLSchema-instance">
<tns:firstName>John</tns:firstName>
<tns:lastName>Smith</tns:lastName>
<tns:gender>M</tns:gender>
</tns:Response>
Now Lets, add the policy to our proxy service:
- Click on CustomerService proxy under CustomerInfo project.
- Click on Policy tab.
- Select "From OWSM policy Store" option.

4. Click on Add
5. Select oracle/wss_username_token_service_policy, click submit.

6. Click on update button.

7. Activate your session in Change Center.
Try testing the OWSM by passing user/pass in soap header.
Eg.
<soapenv:Envelope xmlns:soapenv="http://schemas.xmlsoap.org/soap/envelope/" xmlns:cus="http://www.example.org/Customer">
<soapenv:Header>
<wsse:Security xmlns="http://docs.oasis-open.org/wss/2004/01/oasis-200401-wss-wssecurity-
secext-1.0.xsd"
xmlns:wsse="http://docs.oasis-open.org/wss/2004/01/oasis-200401-wss-wssecurity-secext-
1.0.xsd">
<wsse:UsernameToken>
<Username>weblogic</Username>
<Password>welcome1</Password>
</wsse:UsernameToken>
</wsse:Security>
</soapenv:Header>
<soapenv:Body>
<cus:Request>
<cus:customerID>1</cus:customerID>
</cus:Request>
</soapenv:Body>
</soapenv:Envelope>
If you get the expected response. Your are done with the exercise.
But if you get below error, you need to follow below steps:
[OSB Security - OWSM:387253]Failed to initialize Owsm Credential Manager. Please validate the Keystore Configuration.
We need to create a keystore and configure the same on weblogic.
1. You can create the keystore with the private key using the portecle ,a GUI tool.
Use this command to start portecle: java -jar portecle.jar
Also refer to previous post on Keystore "Generating keystore using JAVA keytool ".
Follow below steps to configure keystore on Weblogic:

- Open the Enterprise Manager console (http://localhost:7001/em)
- Under the navigator pane, expand Weblogic Domain, right-click on your domain name, select Security and then Security Provider Configuration
- Add the keystore details
After the server startup procedure ends, we have to create the credential to be used by the Service Bus Test Console to validate our configuration:
- Open Enterprise Manager console (http://localhost:7001/em)
- Under the navigator pane, expand Weblogic Domain, right-click your domain name, select Security, then Credentials
- Click the Create Key and enter the following:
- Key: basic.credentials
- User Name: weblogic (change it to reflect your environment - must be a valid user)
- Password: welcome1 (change it to reflect your environment)
- Confirm Password: same as above (see Figure 23)
- Click OK
Now that we have configured our keystore and credentials, login to sbconsole and test the CustomerService again with Service Bus Test Console. The payload is the same as before:
<?xml version="1.0"?> <env:Envelope xmlns:env="http://schemas.xmlsoap.org/soap/envelope/"> <env:Header /> <env:Body> <cus:Request xmlns:cus="http://www.example.org/Customer"><cus:customerID>1</cus:customerID></cus:Request></env:Body></env:Envelope>
Since we created the Key on weblogic. We don't need to pass user/pass in SOAP header.

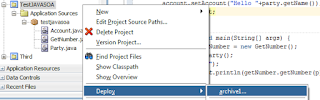
Will post some more security scenario with respect to OSB.
Thanks.